
Thermo Fisher Phenom XL SEM
Overview
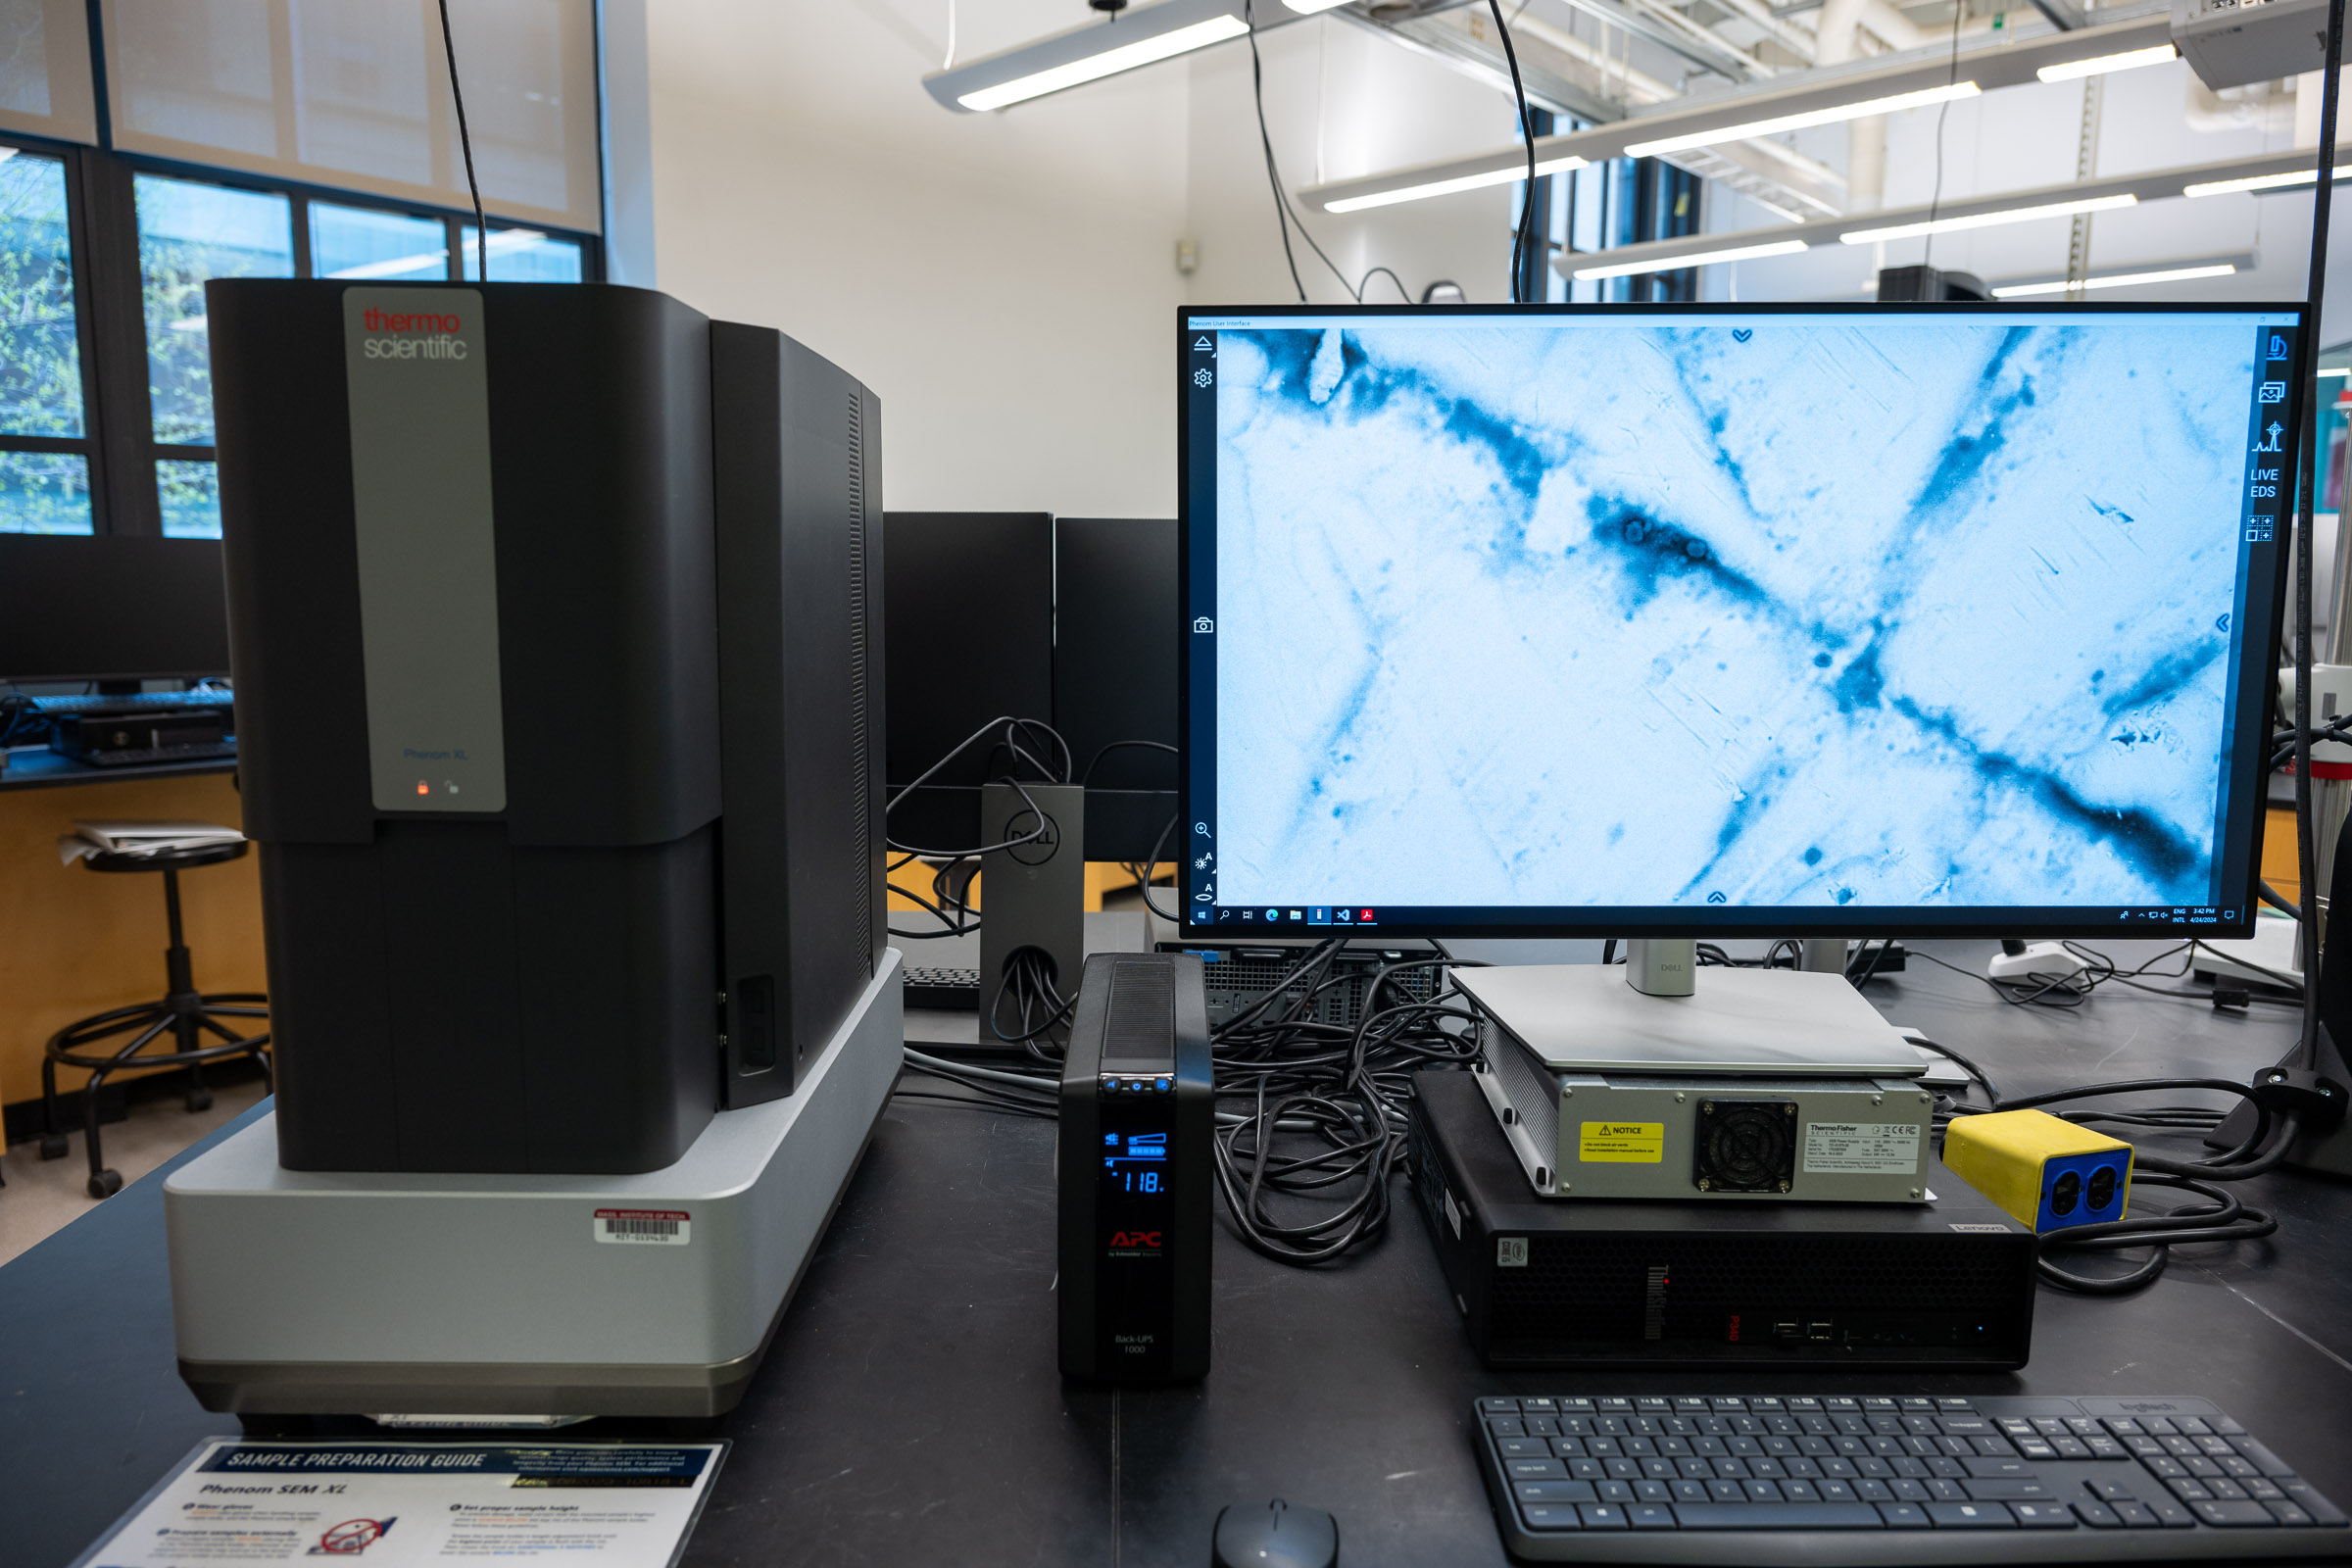
The Phenom XL is the Breakerspace SEM for large samples, multiple stubs, and EDS elemental analysis. It has a 100 mm x 100 mm stage, BSD and SED detectors, low-vacuum imaging for non-conductive samples, and energy dispersive spectroscopy (EDS).
This page is the operating page for the Phenom XL only. For the Phenom Pure, use the Phenom Pure operating page. For help choosing between the two SEMs, use the shared SEM hub.
Quick Actions
Get started
Learn and reference
What Makes This Phenom XL Different
The shared SEM hub explains what scanning electron microscopy can show in general. This Phenom XL page focuses on the capabilities that distinguish the Breakerspace XL configuration from the Phenom Pure in this lab.
The XL is the better choice when you need a larger stage, multiple mounted samples in one session, or elemental information from EDS. It accepts a 100 mm x 100 mm sample tray and can hold several stubs at once, which makes it useful for comparing related samples without repeatedly unloading the microscope.
EDS Elemental Analysis
EDS, or energy dispersive spectroscopy, uses X-rays produced when the electron beam hits the sample. Different elements tend to emit X-rays at characteristic energies, so the detector can estimate which elements are present in a spot, line, or mapped region.
This is useful when the SEM image alone is not enough. A bright particle, dark inclusion, coating, residue, corrosion product, or unexpected region may look different because of shape, charging, or composition. EDS helps ask whether that region also has a different elemental signature.
Common XL questions include:
- Is this particle mostly metal, mineral, glass, salt, polymer filler, or something else elemental?
- Does this coating or residue contain elements that are absent from the surrounding material?
- Are bright and dark SEM regions different elements, or mainly topography and detector contrast?
- Where are specific elements concentrated across a particle, fracture surface, filter, or cross section?
EDS is most convincing when it is interpreted with the SEM image, sample history, mounting material, coating, voltage, and working distance. It estimates elements; it does not directly identify molecules, crystal structure, oxidation state, or exact composition without a more careful method.
Standard Operating Protocol
Instrument Startup
- Confirm the normal starting condition: the XL tray is inside the closed sample compartment, the Phenom software is closed, Windows is at the sign-in screen, and the microscope is in standby.
- Log on to the instrument workstation using your MIT Kerberos.
- Start the Phenom User Interface software.
- Wake the instrument if needed.
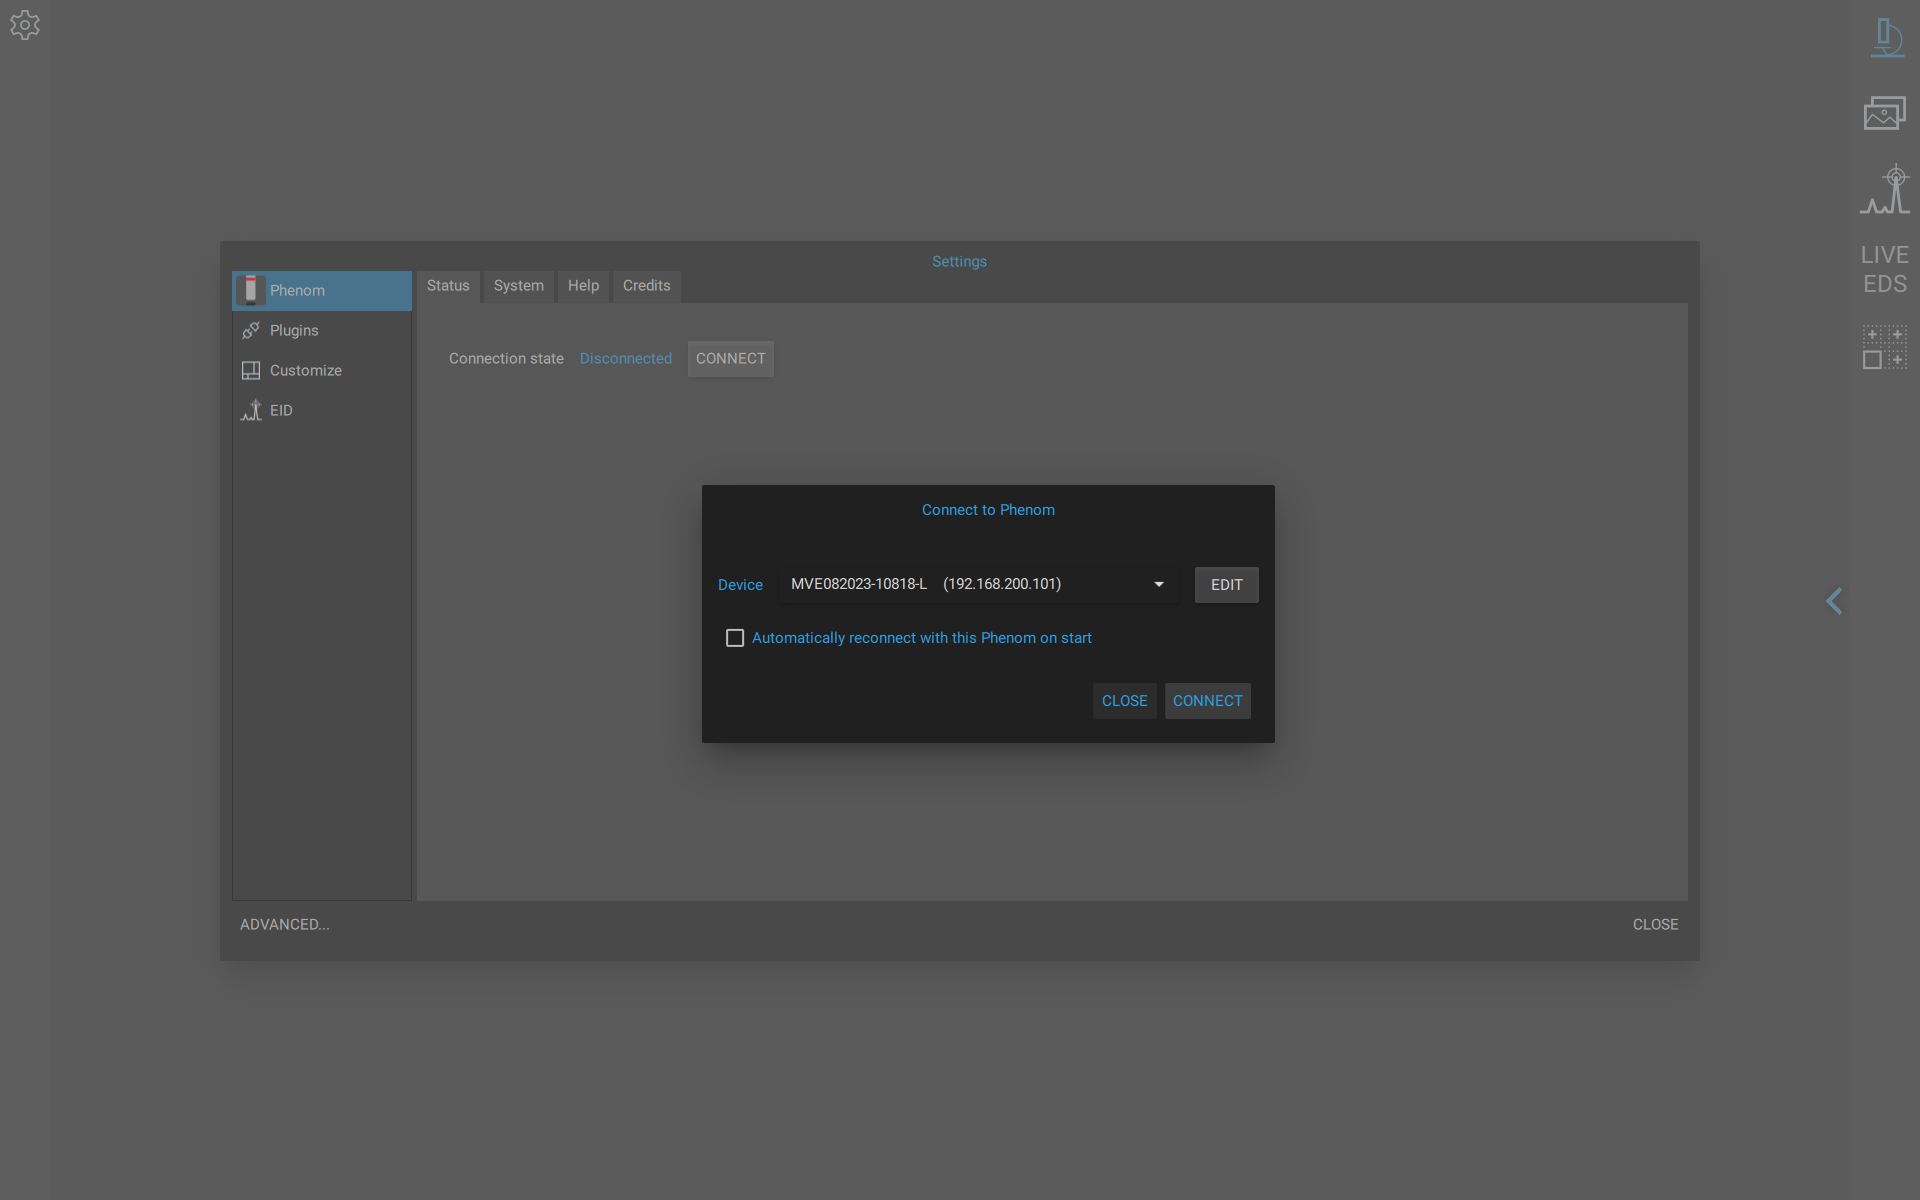
- If the instrument does not connect automatically, open Settings / Phenom / Status and connect to the microscope.
Operation
- Wear nitrile gloves when handling samples, stubs, sample holders, stages, and sample-prep tools.
- Prepare samples externally at the sample prep table.
- Confirm that the sample is dry, firmly attached, free of loose particles, and below the XL height limit.
- Use the height-setting dial to set the tallest point of the sample approximately 5-7 mm below the top edge of the XL sample tray: turn the dial 5-7 notches in the direction that lowers the sample unless staff instruct otherwise.
- Load the sample tray into the instrument.
- Remove gloves before using the computer.
- Set the image label and save location.
- In NavCam, use the magnification, brightness/contrast, and focus controls until the image is clear enough to navigate the loaded sample.
- Characterize the sample as appropriate for your goals (see detailed operating instructions).
- Wear gloves again, unload samples, and leave the tray clean and stored correctly.
Instrument Shutdown
- Save and copy any data you need.
- Close the Phenom software. Press F11 if you need to exit fullscreen view.
- Log off Windows.
- The microscope will put itself in standby.
Phenom XL Sample Limits
- Maximum sample footprint: 100 mm x 100 mm.
- Maximum sample height: 35 mm absolute instrument limit, but normal loaded samples should sit approximately 5-7 mm below the top edge of the sample tray unless staff instruct otherwise.
- Use stub tweezers when loading mounted stubs into the tray.
- For EDS, a working distance around 4-7 mm is usually a useful target after the sample is loaded and in SEM view.
- Never load a loose, wet, shedding, or over-height sample.
Compatible Materials And Shared Sample Rules
- Samples must be non-hazardous and safe to handle in the Breakerspace.
- Samples must be dry, except for samples intentionally frozen on an approved cold stage.
- Samples must be firmly attached to a stub or approved holder.
- Samples must be free of loose particles. After mounting, gently tap or blow the sample with compressed air away from the microscope and electronics.
- Non-conductive samples can be viewed in low-vacuum mode, sputter coated, or connected to the stub with conductive tape/paint.
- Wear nitrile gloves when handling samples, stubs, sample holders, stages, and sample-prep tools.
- Remove gloves before using the computer keyboard, mouse, or touchscreen.
If you have any questions about whether a material is appropriate to characterize in the Breakerspace, please ask before bringing it to the lab.
Sample Prep At A Glance
| Sample type | Fast prep | Notes |
|---|---|---|
| Conductive solid | Carbon pad, conductive tape, silver paint, graphite paint, or clamp | Make sure the feature of interest is near the highest point and the sample is grounded. |
| Non-conductive solid | Low vacuum, sputter coating, or conductive bridge to the stub | Low vacuum is non-destructive but lower resolution; coating improves imaging but changes the surface. |
| Powder or particles | Sparse layer on carbon pad, then tap and blow off loose material | Avoid thick piles and overlapping particles, especially for size/shape measurements. |
| Wet, moist, or biological | Dry, critical-point dry, use a very small amount in low vacuum, or freeze on an approved cold stage | Wet samples can outgas and damage the microscope if not prepared correctly. |
| Beam-sensitive polymer/organic sample | Lower voltage/current, lower magnification, shorter dwell time, cooling, or light coating | Watch for cracking, melting, boiling, drift, or image changes over time. |
| Magnetic sample | Mount very securely and use longer working distance if needed | Magnetic samples can distort focus/stigmation and, if loose, can be pulled from the stub. |
For EDS samples, prefer conductive mounting and avoid coating materials that interfere with the elements of interest. Gold coating is excellent for imaging but can complicate EDS; carbon coating is often better for inorganic EDS.
Quick Imaging Settings
| Goal | Starting settings | Watch for |
|---|---|---|
| General imaging | 10 kV, Image intensity, auto brightness/contrast, manual or auto focus | Good balance of resolution, speed, and sample tolerance. |
| Surface-sensitive imaging | 5 kV, Low or Image intensity | Useful for residues, stains, coatings, and beam-sensitive surfaces. |
| Non-conductive sample | Low vacuum, sputter coating, or conductive tape/paint | Charging appears as brightening, drift, distortion, or loss of detail. |
| High-quality image capture | Start with default acquisition, then increase Scan Size (image resolution) or Averaging only if stable | Long acquisitions magnify drift, charging, vibration, and beam damage. |
For EDS, start with 15 kV, Map intensity, and a working distance around 4-7 mm. Stop EDS before moving to another area.
Detailed Operating Instructions
The sections above are meant as a quick reference for trained users. The sections below are written as a training guide for new users and include the practical details, images, and troubleshooting cues that are easiest to understand at the instrument.
Phenom XL Sample Loading
- Open the sample compartment using the software eject button.
- Remove the sample tray.
- Using stub tweezers, push each stub pin into an open hole in the tray.
- Confirm that every sample is firmly attached and no loose particles are present.
- Use the height-setting dial to set the tallest point of the tallest sample approximately 5-7 mm below the top edge of the sample tray: turn the dial 5-7 notches in the direction that lowers the sample unless staff instruct otherwise.
- Insert the sample tray into the loading bay.
- Close the compartment using the same software eject button.
- Wait for the stage to move to the optical NavCam position.
The height rule is instrument-critical. Do not use the Phenom Pure holder-edge rule on the XL, and do not estimate height by eye if a sample is tall or irregular.
Project Label And Save Location
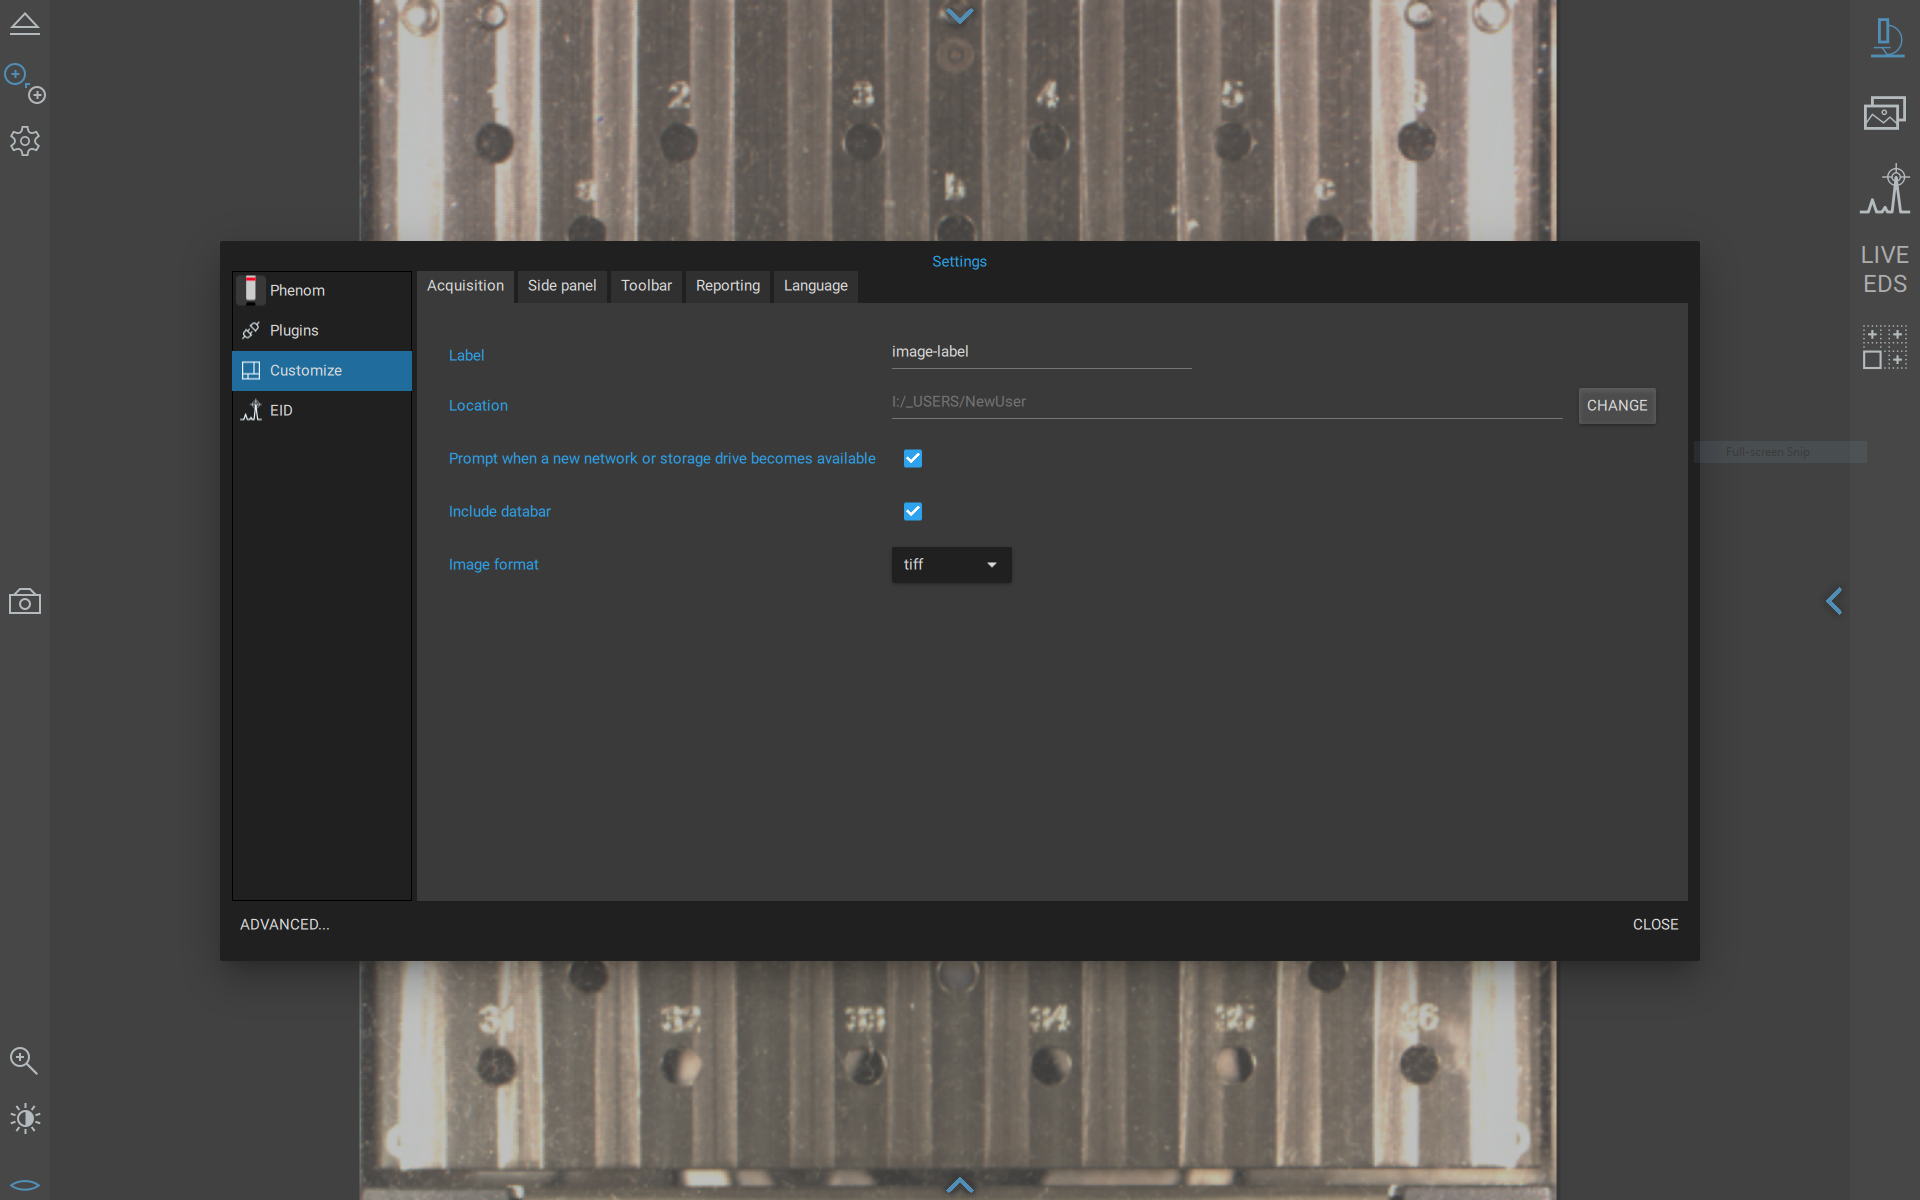
While the sample is loading, open Settings / Customize and set a useful image label and save location. Do this before you start collecting images so your files land in a project folder that will still make sense later.
NavCam
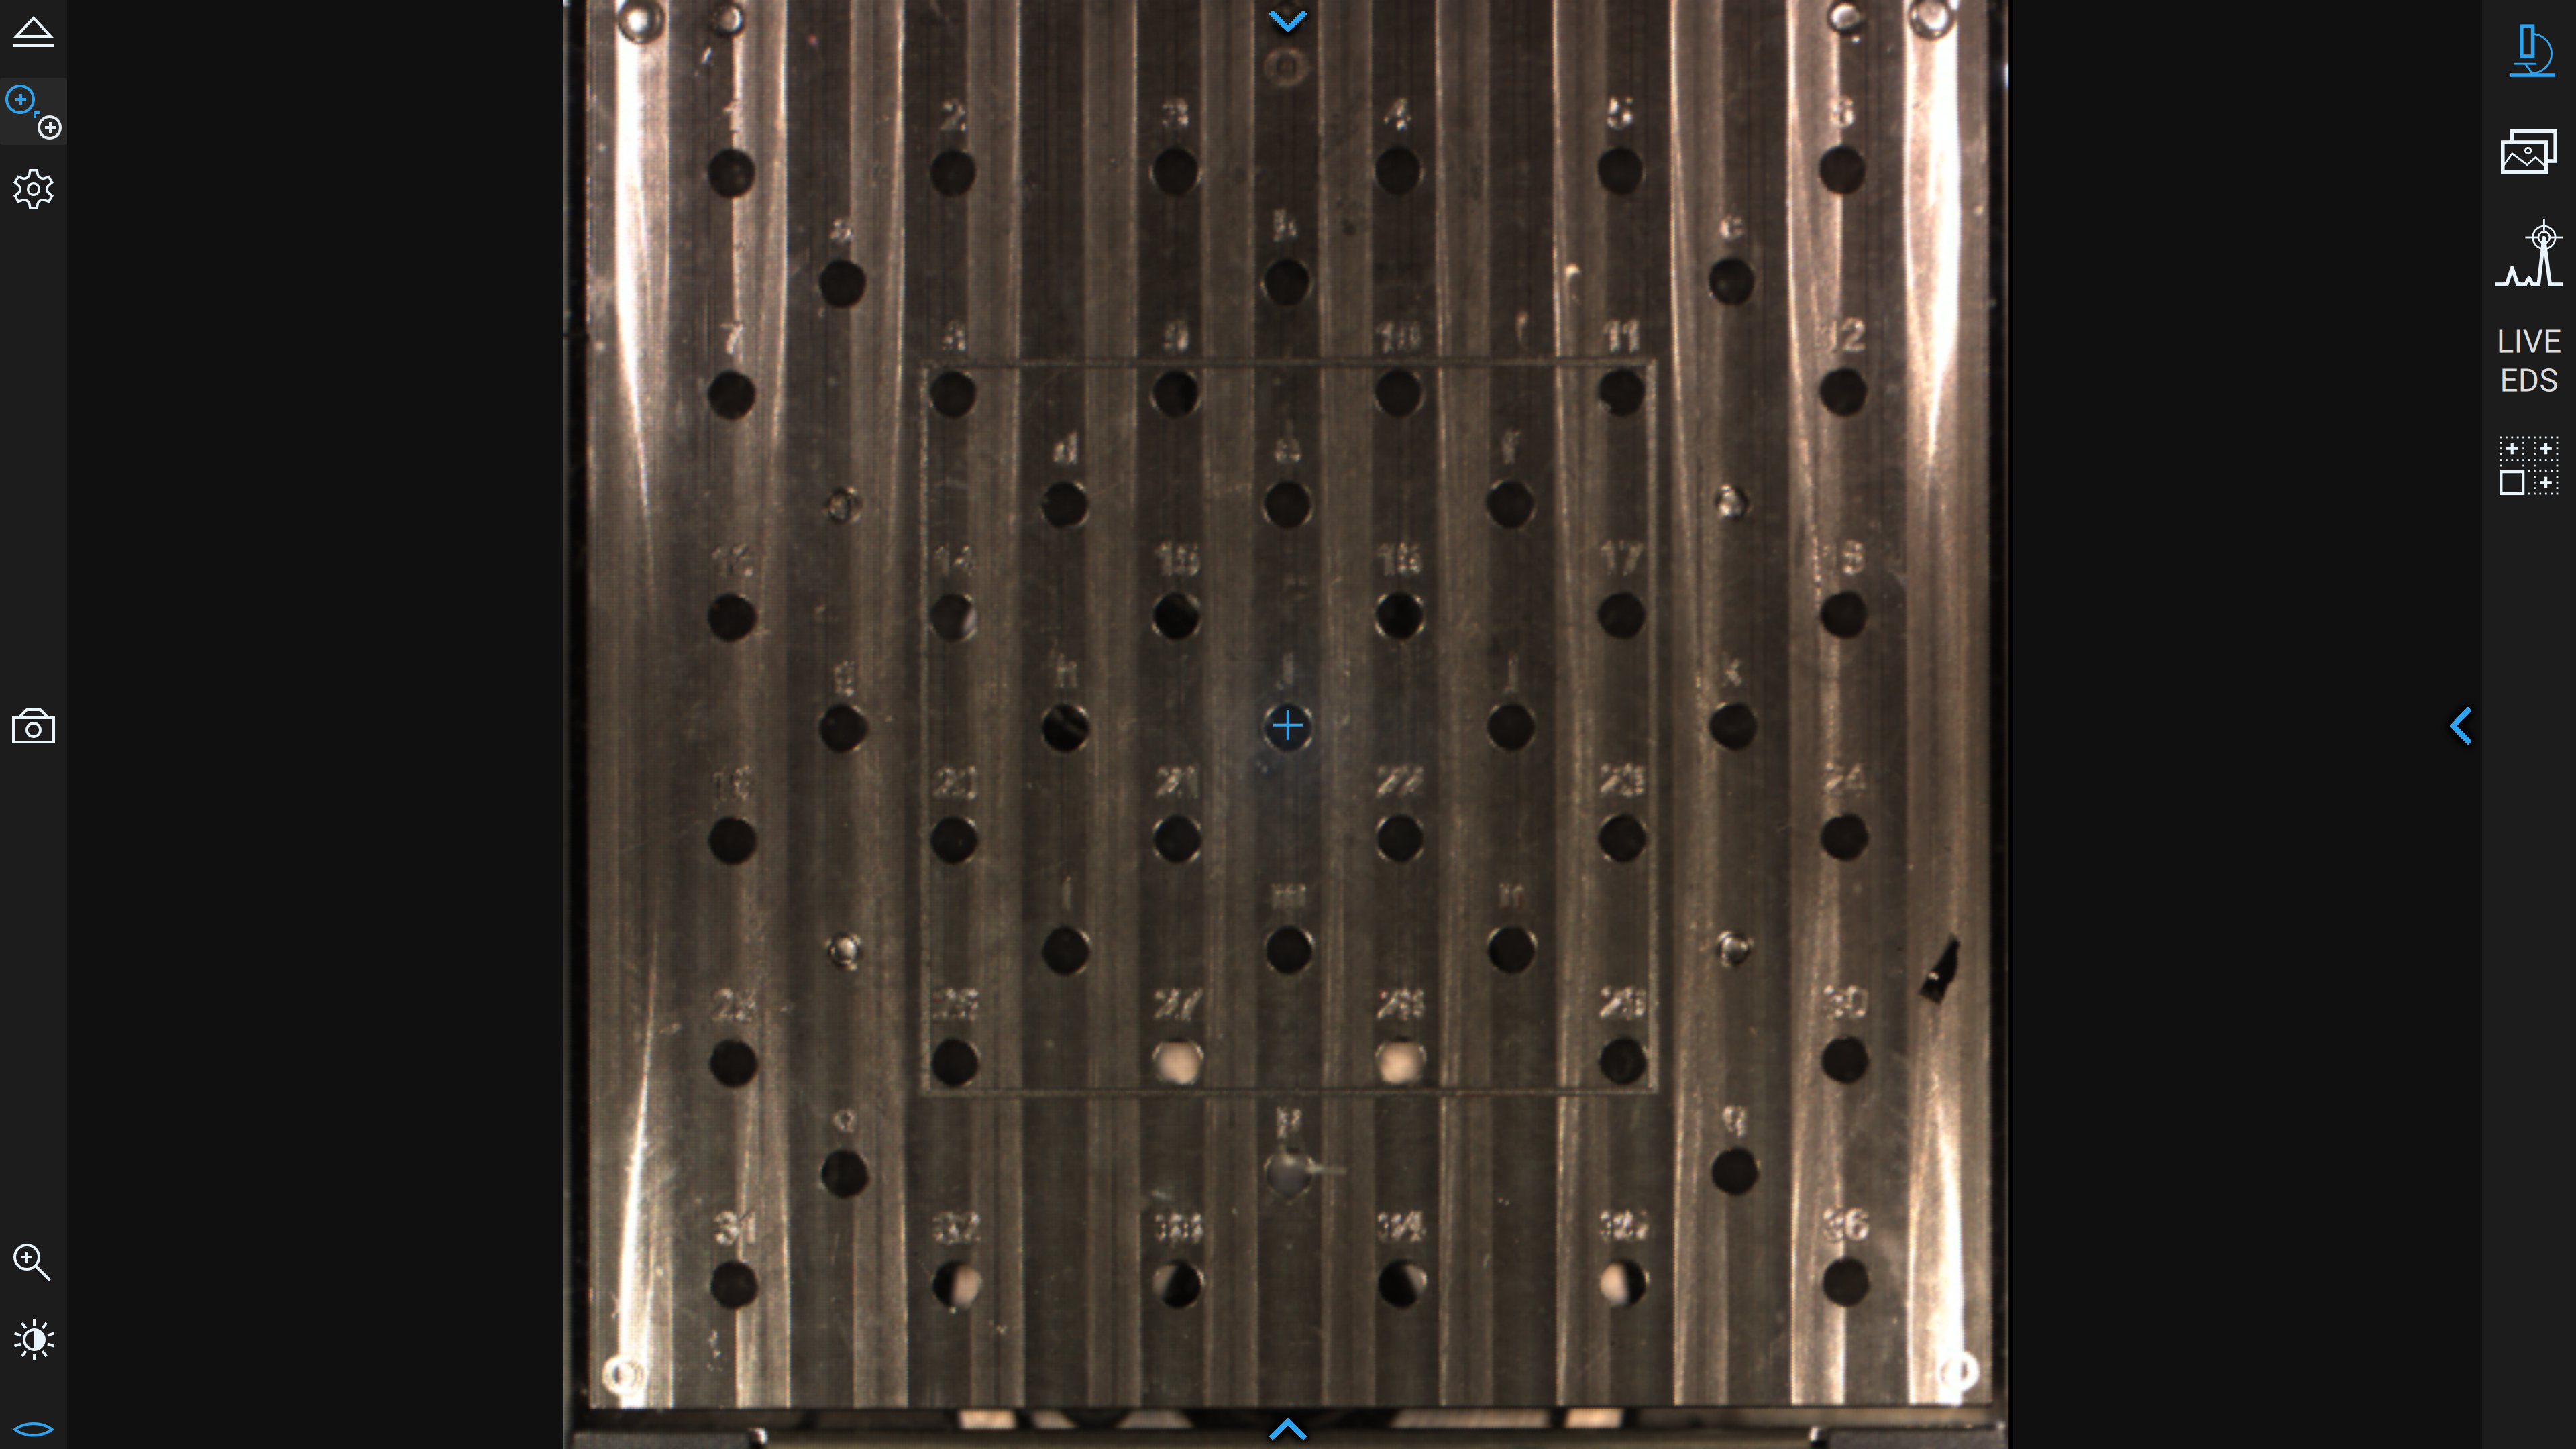
When the sample finishes loading, the software shows the NavCam view. This is an optical overview of the sample stage that helps you choose regions of interest before switching to SEM imaging.
Use this moment to:
- Confirm that the expected sample or stub is visible.
-
Check that the sample did not shift during loading.
-
Use the magnification, brightness/contrast, and focus controls as needed for navigation.
- Save a NavCam image if it will help document where later SEM images were taken.
SEM View
Select the upper-left icon immediately below the eject/open-close icon. It shows two circles with plus signs and an arrow between them; its mouse-over label is move to SEM. This enters the SEM view. Start zoomed out, find a recognizable feature, focus, then increase magnification gradually.
Useful controls:
- Mouse wheel changes the selected control, usually magnification, focus, brightness, or contrast.
- Right-click and drag horizontally on the live image to adjust focus quickly.
- Use automatic brightness/contrast for routine imaging; it normally gives very good results and rarely benefits from manual adjustment.
- Use autofocus only when there is enough contrast near the center of the image.
- At higher magnification, refocus after changing magnification, voltage, detector, vacuum mode, or working distance.
- Press F11 to leave fullscreen mode if you need access to the Windows taskbar.
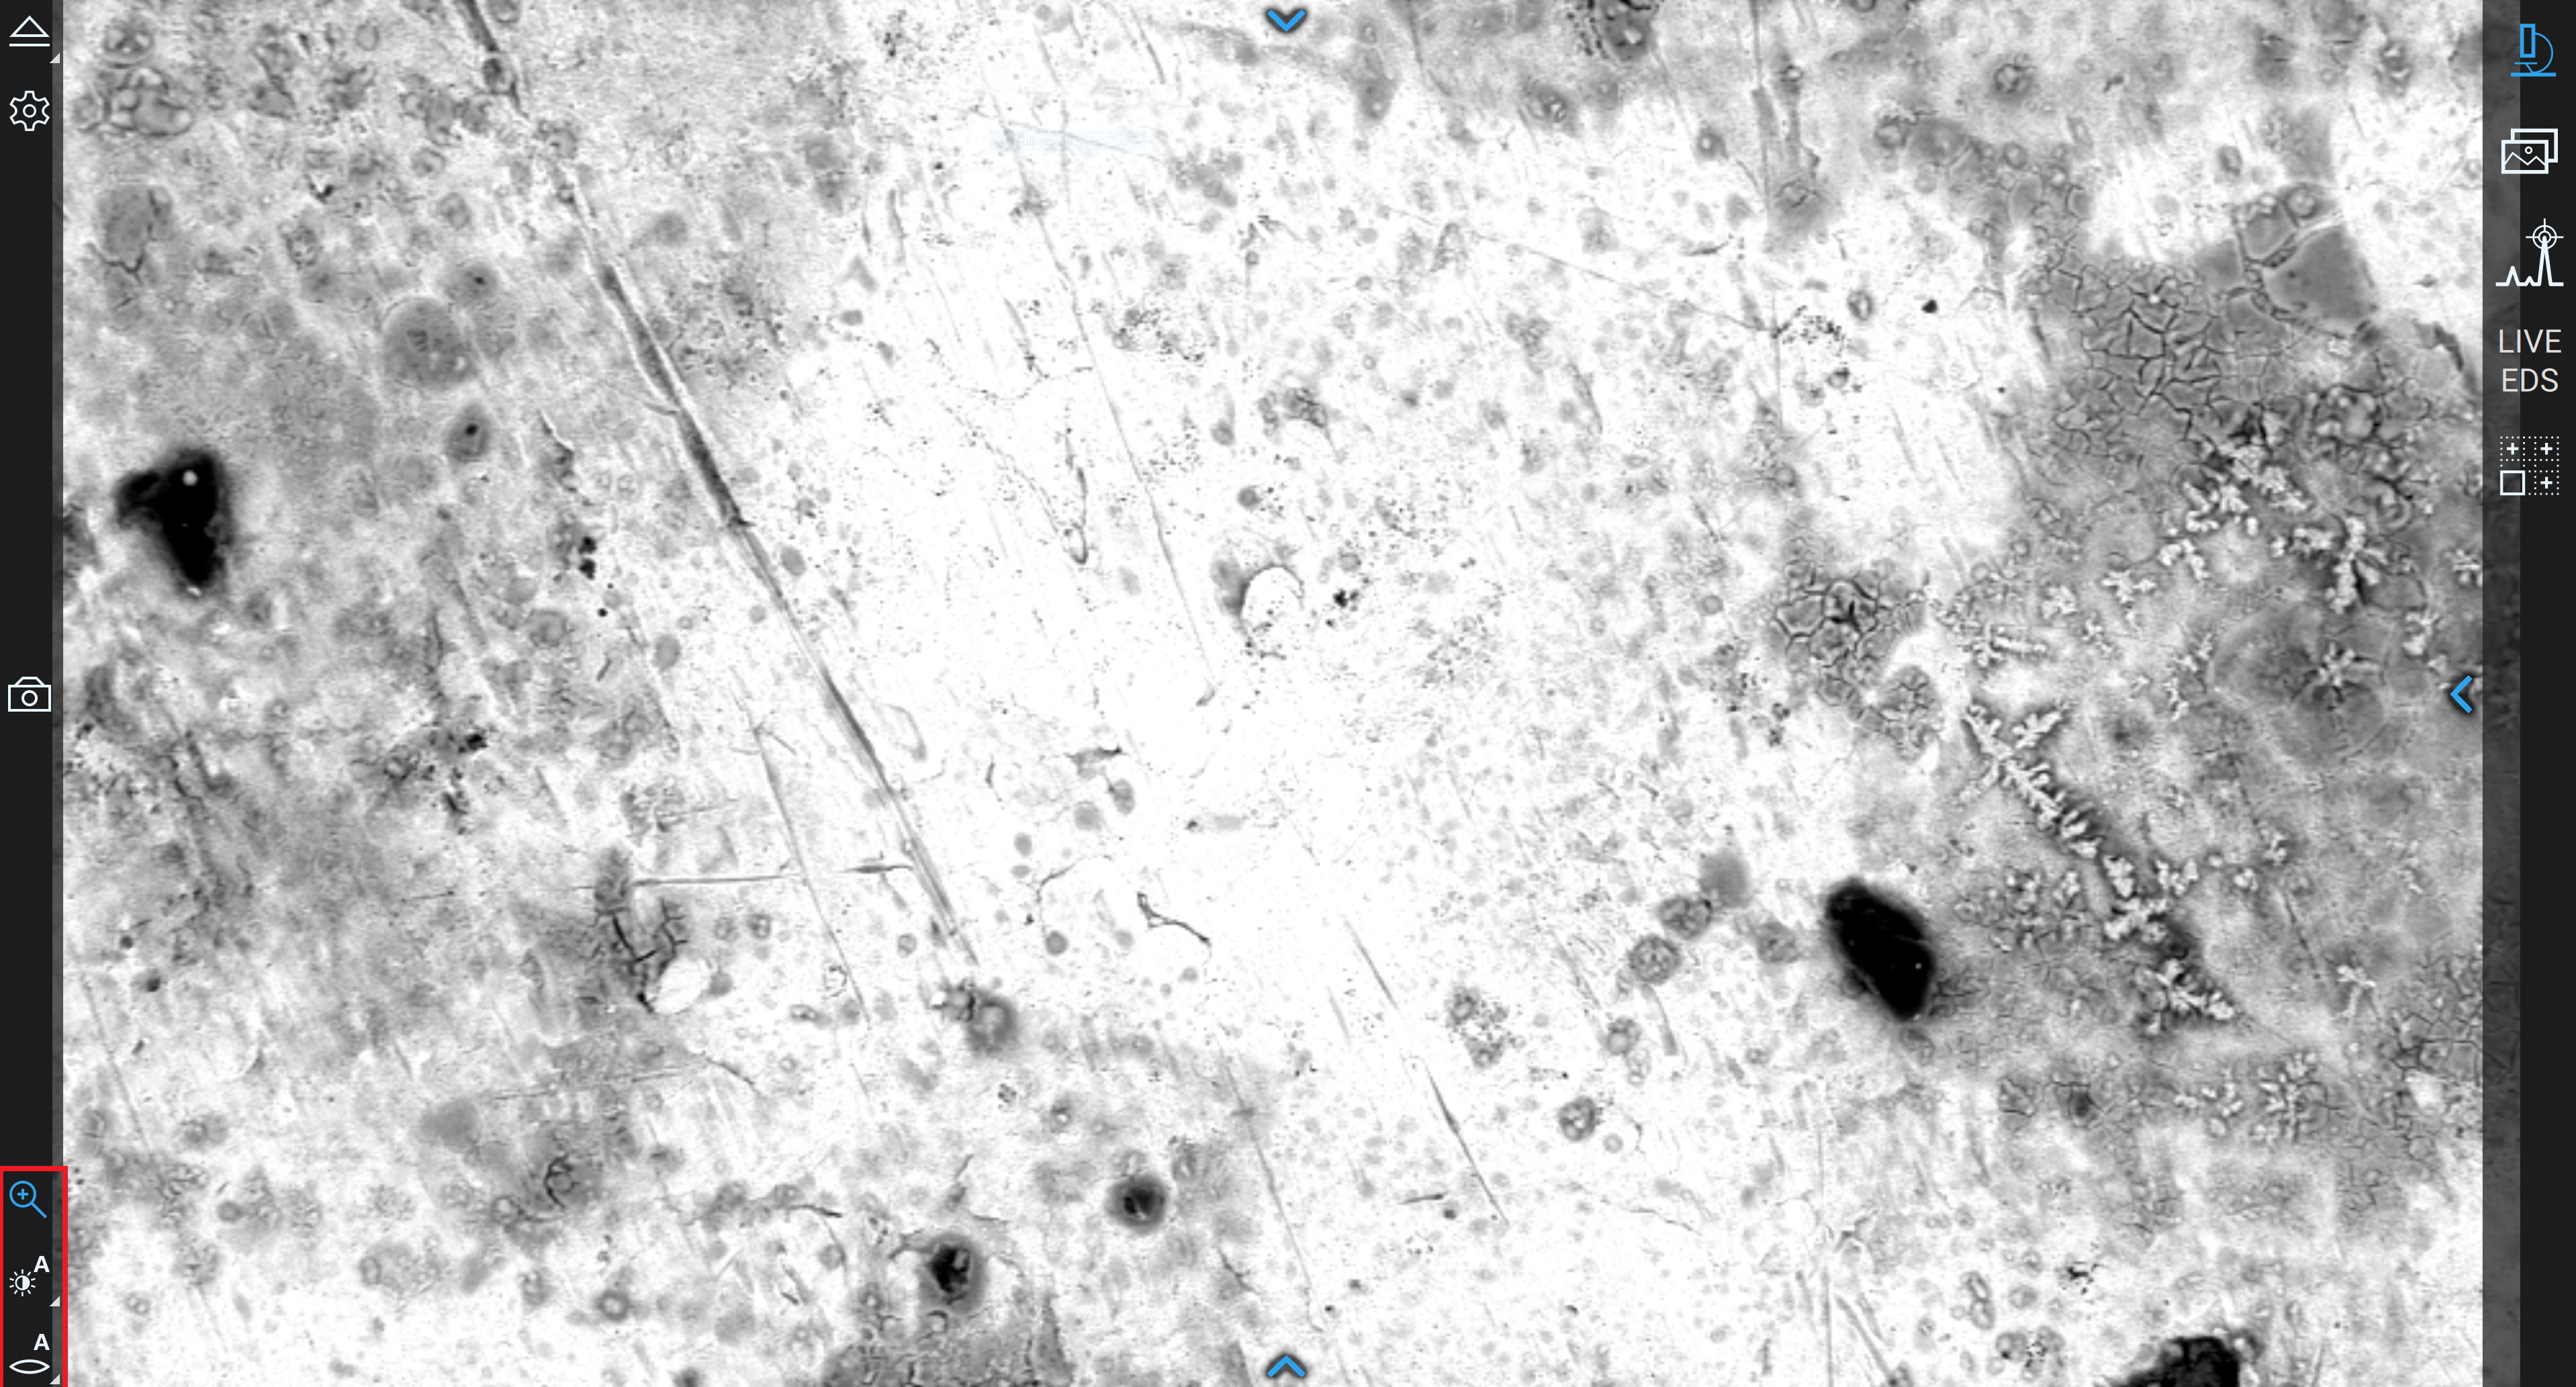
Brightness and contrast determine how the collected data is displayed, not its quality. Accelerating voltage and beam intensity affect the signal being collected. Manual brightness/contrast adjustment is not part of routine introductory training; see common failure modes for the occasional particle-on-carbon-sticker exception.
Choosing Detector, Voltage, Vacuum, And Intensity
| Setting | Use it when | Practical note |
|---|---|---|
| SED | You want surface/topographic detail | Usually best for conductive, high-vacuum samples. |
| BSD | You want composition/atomic-number contrast or low-vacuum imaging | Heavy elements appear brighter than light elements. |
| 5 kV | You care about surface-sensitive features or beam-sensitive samples | Lower signal, but less penetration and often less damage. |
| 10 kV | You want a general imaging starting point | Good default for many samples. |
| 15 kV | You need stronger signal or more beam penetration | More beam interaction and more chance of beam damage. |
| Low intensity | High magnification or beam-sensitive samples | Slower/noisier, but gentler. |
| Image intensity | General imaging | Good default for most SEM images. |
| Point intensity | Lower magnification spot work | Useful when signal is low and fine resolution is less critical. |
Compare BSD and SED on the same feature, then vary accelerating voltage and beam intensity one at a time to see what best reveals it. Refocus and run automatic brightness/contrast after changes. For beam-sensitive samples, begin with lower accelerating voltage and beam intensity and increase them only as needed; higher settings can damage or change the sample.
For general live navigation, use a Scan Size of 960 × 540 with Medium Averaging. Change those live-view settings only when the sample or imaging task benefits from a different balance of speed, noise, and detail.
Image Acquisition And Gallery
Press the camera icon to acquire an image. Images are saved with the Scan Size (image resolution) and Averaging selected in the acquisition settings. Start with the default settings, take a test image, then increase Scan Size or Averaging only if the sample is stable.
Higher averaging improves signal-to-noise but takes longer. If the sample is charging, drifting, vibrating, or degrading, longer acquisition can make the final image worse.
The Gallery shows images in the active folder. You can add measurements and notes in the gallery. If you annotate an image, save the annotated version as a new file so the original remains unchanged.
EDS And Live EDS
Energy dispersive spectroscopy (EDS) uses X-rays generated by the electron beam to estimate which elements are present in a region of the sample. On the Phenom XL, use EDS for elemental spot checks, line scans, maps, and reports.
Start with:
- 15 kV accelerating voltage.
- Map beam intensity.
- Working distance between about 4 mm and 7 mm.
- A stable, well-focused image before starting analysis.
- Conductive mounting or low-vacuum/coating strategy appropriate for the sample.
Live EDS is useful for quick spot checks. Formal EDS/EID projects are better when you need saved spectra, maps, reports, or raw CSV data.
Always stop EDS or Live EDS before navigating to another area, returning to normal SEM observation, or unloading. If the software complains when you try to leave EDS, return to the EDS interface and press stop.
For EDS data:
- Save EDS/EID projects if you need to return to the analysis later.
- Export reports, maps, spectra, and CSV data as needed.
- Be cautious with automatic peak labels. Check whether peaks overlap and whether coating, tape, stub, or mounting materials contributed elements.

Phenom XL Sample Unloading
- Stop EDS, Live EDS, or image acquisition if any collection is running.
- Return to the normal SEM interface if needed.
- Use the eject/unload control to bring the sample tray back to the loading position.
- Wear gloves before touching the sample tray.
- Open the sample compartment.
- Remove your sample.
- Return the tray to the sample compartment and close the door.
- If the tray is dirty, ask staff whether it should be cleaned before storage.
Data Processing And Analysis
SEM image files are saved in the active folder selected in the Phenom software. Before collecting images, set a project-specific label and folder so files are easy to find and interpret later.
For basic image analysis:
- Use the Gallery to review images, add scale measurements, and add notes.
- Save annotated images as new files.
- Keep the original image file when possible.
- Record detector, voltage, vacuum, magnification, working distance, and sample prep if those conditions matter to your interpretation.
Common Failure Modes
| Symptom | Likely cause | What to try |
|---|---|---|
| Image gets brighter, washes out, streaks, or drifts | Charging on a non-conductive sample | Use low vacuum, sputter coat, add conductive tape/paint, lower voltage/intensity, or image near a conductive bridge. |
| Sample cracks, melts, boils, shrinks, or changes during imaging | Beam damage or outgassing | Lower voltage, lower intensity, reduce magnification, shorten acquisition, cool the sample, or stop and ask staff. |
| Poor focus at high magnification | Charging, magnetic sample, working distance, stigmation, contamination, or unstable sample | Verify with a standard sample, lower magnification, adjust focus/stigmation, use low vacuum/coating, or ask staff. |
| BSD image has almost no contrast | Detector mode or source/contrast issue | Confirm detector mode, check contrast on a standard sample or bare aluminum stub, and ask staff if source alignment may be needed. |
| Autofocus performs badly | Not enough contrast in the center of the field | Move to a feature-rich region, use automatic brightness/contrast before autofocus, then adjust focus manually if needed. |
| A particle on a carbon conductive sticker is poorly represented after automatic brightness/contrast | The automatic adjustment includes the surrounding sticker in its brightness/contrast calculation | Manually adjust brightness/contrast to represent the particle; the uninteresting sticker region may become all black. This changes the display, not the collected data, and is rarely needed during introductory training. |
| Sample does not move from load position to NavCam | Sample holder not seated, holder not recognized, or loading process interrupted | Press eject/load again, check holder seating, and ask staff if the holder needs activation or cleaning. |
Phenom XL Specific Failure Modes
| Symptom | Likely cause | What to try |
|---|---|---|
| Sample appears too close to the detector or stage will not move as expected | Sample may be too tall for the XL tray position | Stop, unload if safe, and verify the sample is approximately 5-7 mm below the top edge of the tray. Ask staff before retrying. |
| EDS has low or no counts | Working distance, voltage, intensity, or geometry is wrong | Use 15 kV, Map intensity, and working distance about 4-7 mm; confirm the detector is collecting before a long map. |
| Cannot leave EDS or Live EDS | Acquisition is still running | Return to the EDS interface and press stop before navigating away. |
Manufacturer Manuals
Exercises
- Level 1 - General Phenom XL training: Prepare and image a small piece of hair. Load it on the XL tray, navigate with NavCam, focus in SEM view, acquire images at several magnifications, and compare a cut end with a torn or broken end. The trainer gives a brief, trainer-operated EDS capability preview and advertises optional Level 2 EDS-focused training.
- Optional Level 2 - EDS practice: Prepare salt and sugar on the same stub. Use morphology first, then EDS on the Phenom XL, to decide which is which. This focused training is available for users who want additional instruction; it is not a prerequisite for independent EDS use.
- Level 2 - Non-conductive sample comparison: Image an uncoated non-conductive sample in low vacuum, then sputter coat a similar sample and compare resolution, charging, and surface contrast.
- Level 3 - Specialist training: Prepare a powder sample sparse enough for particle sizing. Acquire images suitable for measuring particle diameter and compare the result with a poorly dispersed sample.