The MIT DMSE Breakerspace is a materials exploration lab open to all undergraduates.
HomeLab
SOPs and tutorials
Lounge
Resources
Team
Innovatest Nemesis 5100G2 Hardness Tester Tutorial
Overview
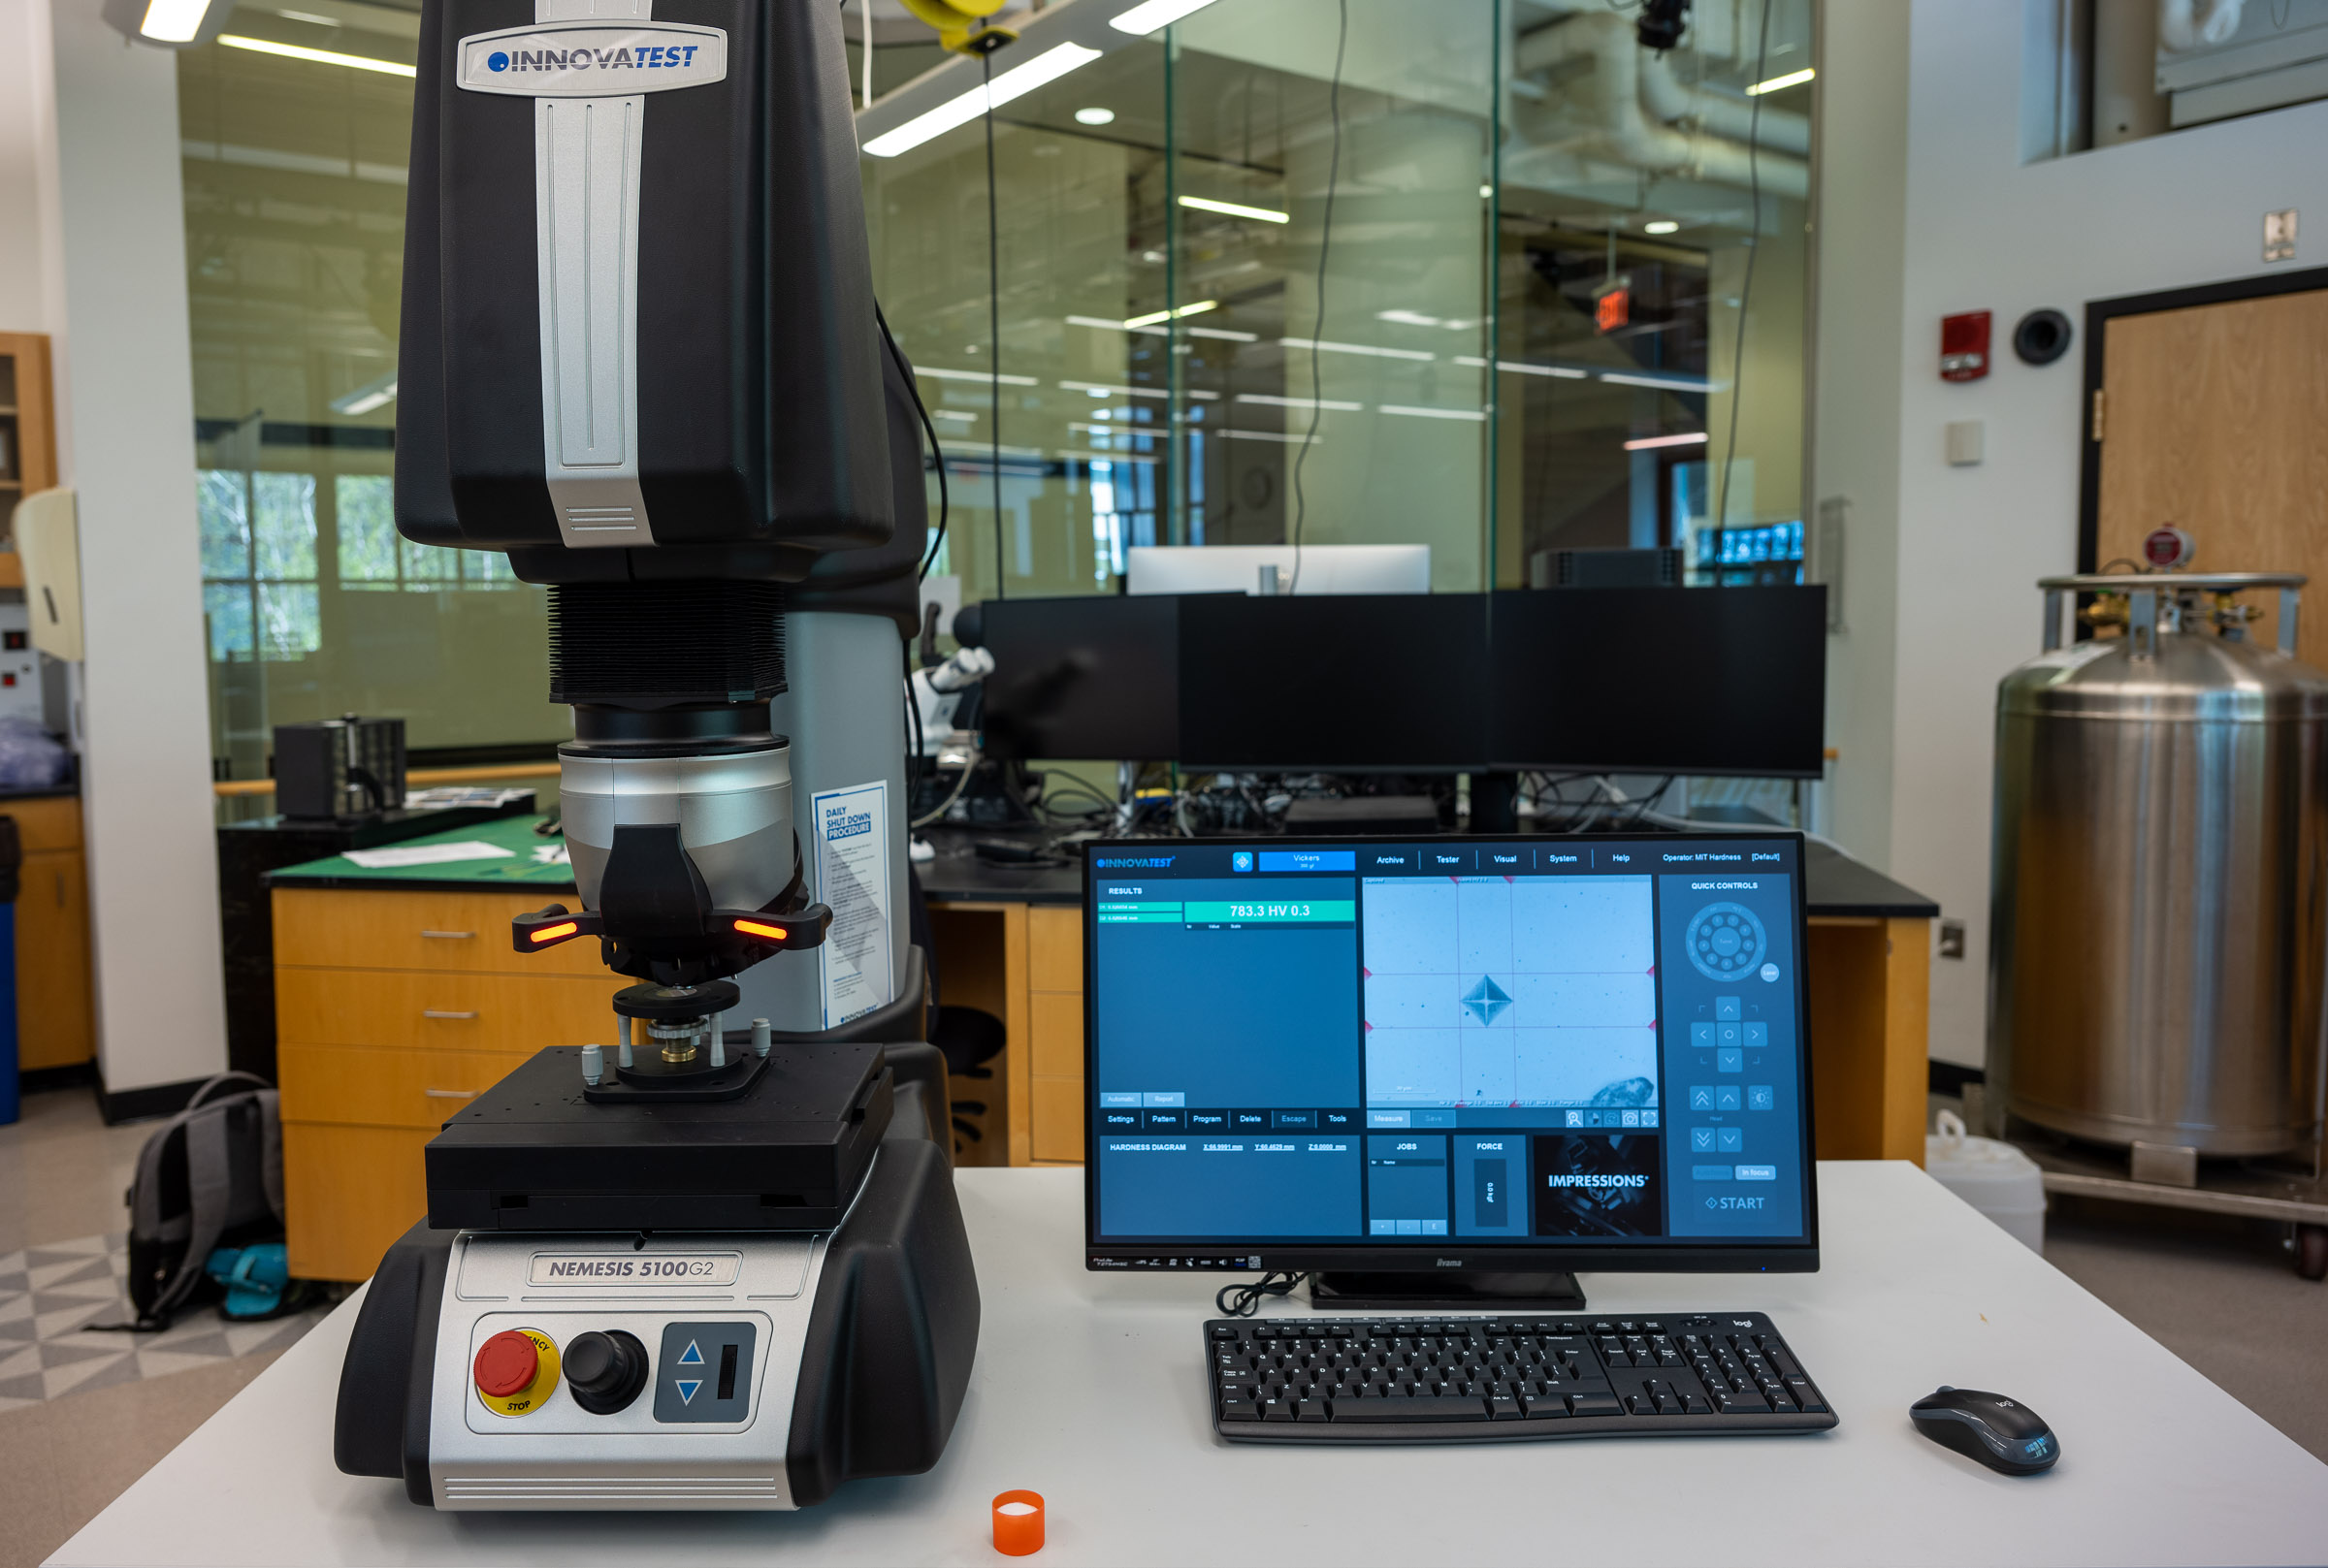
The Innovatest Nemesis 5100G2 Hardness Tester has a 9-position turret to automatically swith between indenters and objectives, and uses a load cell to measure applied load. It also has an XY stage, and can be programmed to run test patterns. The Breakerspace system is equipped with indenters for Vickers, Rockwell, and Brinell, and can run a range of scales.
Index:
- Standard operating protocol - (startup, operation, shutdown)
- Materials and sample prep
- Common failure modes
- Manufacturer manuals
- Exercises
Standard Operating Protocol:
Start Up
- Turn machine on red power switch in the back
- Log in to the Impressions software. The username is “mit hardness” and leave the password field empty (no password)
Operation
- Position your sample on the sample stage
- Find a clean spot on your sample using the camera. Use the joystick or the software to move the sample stage.
- Get into focus with 2.5x, then change 10x and refocus.
- Click In Focus button
- Choose your hardness test using the top left blue box.
- Click Start and the testing procedure will proceed automatically
- To make a pattern, click “Pattern” and choose your settings. Make sure to return to single point when you’re done using the pattern!
Shut down
- Remove your sample from the machine and turn off the workstation.
- Toggle the power switch in back of the machine to off
Materials
- Prepare a flat and ideally polished sample.
- Polishing equipment can be found next to the sink. Unpolished samples won’t damage the machine, but will give worse results.
Common failure modes
- Patterns are retained across users, so make sure you are back in single point mode before turning off the machine and before measuring your sample.
- For the Rockwell hardness test, make sure your tip matches your surface. A too soft tip for your surface may result in damage to the machine. For example, HRA uses a harder tip than HRB.
- While hardness values calculated through Vickers tests with different loads are equal (i.e. Vickers 1 kgf gives the same value as Vickers 5 kgf), this is not true for Rockwell tests. You need a conversion table to compare HRA and HRB values.
Manufacturer manuals
Exercises
- Intro: Determine the hardness of a piece of metal with a Vickers test
- Beginner: Use the pattern function to determine the hardness of multiple spots in one run